Showing posts with label Thrifty Nifty Thursdays. Show all posts

Thursday, April 5, 2012

Homemade laundry detergent about $6 to make


Homemade Laundry Detergent: Cost about $6 to make and will last 180-600 loads depending on your washer
After I had my little boy I was freaked out about chemicals in certain everyday products I would use around him. One of my concerns was with my laundry soap. So I started buying draft and other dye free all natural laundry soap, but this started getting REALLY REALLY expensive! So I went to a class to learn how to make all my own cleaning products. The laundry soap has by far been my favorite of the products I make. It is so easy to make and it works great. I have a 16month old son so I have tons of messes to wash away and the stuff really works. You still need to pre-treat stains but it works great. You will also want to continue to use fabric softener. There are recipes for softener online that you can make but I have not found one that I like yet. So here is your Thrifty Thursday for the week! Homemade Laundry soap
1 5 gallon bucket and lid
4 Cups - hot tap water
1 Fels-Naptha soap bar
1 Cup - Washing Soda (this is not the same as baking soda! Make sure to get washing soda)
½ Cup Borax
All of these items I always find at Walmart in the laundry detergent section (except the 5 gallon bucket)


- Grate the bar of Fels-Naphtha soap and add to saucepan of hot water. Stir continually over medium-low heat until soap dissolves and is melted. ( I bought a cheap cheese grater at the store, I only use it for grating soap)
-Fill a 5 gallon bucket half full of hot tap water. Add melted soap, washing soda and Borax. Stir well until all powder is dissolved. Fill bucket to top with more hot water. Stir, cover and let sit overnight to thicken. (it will look like egg drop soup)
After the soap has set over night it is ready to be used...
-Stir the 5 gallon bucket full (you need a really long stirrer) fill a used, clean, laundry soap dispenser half full with soap and then fill rest of way with water. Shake before each use. (will gel)
-Optional: You can add 10-15 drops of essential oil. Ideas: lavender, rosemary, tea tree oil. (I add my essential oil to the to my soap dispenser not to the 5 gallon bucket. My favorite in lemon grass and tea tree. Tea tree oil has disinfecting agents)
-Yield: Liquid soap recipe makes 10 gallons.
-Top Load Machine- 5/8 Cup per load (Approx. 180 loads)
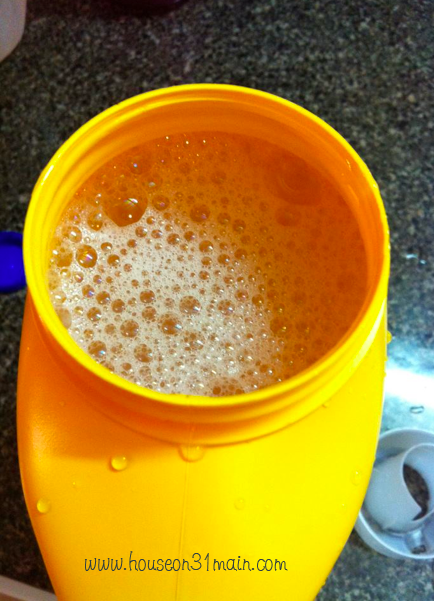
-Front Load Machines- ¼ Cup per load (Approx. 640 loads)

This is what it will look like after sitting overnightThis is what it looks like in your jug. Remember to shake before each use.


Thursday, February 23, 2012

Being a Thrifty Nifty: Once A Month Cooking

Ok so I have always wanted to try doing once a month freezer cooking. I finally stopped making excuses and I tried it! It went really well! So here is a little blurb about my first try at cooking meals and freezing them. There are two reasons why I wanted to do this. 1. I wanted to help my family save money, and I did that! 2. I really hate cooking every night but I did not mind doing it all in one day! Now I just throw my freezer item in the oven and we are good to go for dinner. I am going to give you my step by step in what I did but also some tips for a few things I discovered along the way that will work better for me next time.

Here we go!
Step 1
Get a book on freezer meals:
I read The Everything Freezer Meals Cookbook
It was a great book, I wanted something that had simple everyday recipes and this one did. It gave great me great tips on how to get started with freezer cooking. There are tons of books out there, but this is the one I liked.

Step 2


After reading the book you have to pick out the recipes you want to cook. I picked out about 14 recipes that I knew I could split into two dinners. The ones that said "feeds 6-8" actually ended up make 3 portions for our family. I am only feeding two adults and 1 14month old. Either way, pick out the meals you want to cook then make a list of everything you need to cook those meals. After, check your pantry and cross off anything you already have and do not need to purchase.

Once your list is complete, go do your shopping!!! Have fun and organize your list so you are not running around the store. Try and keep things grouped together so that your shopping is quick and organized!

Step 3:
Start cooking! Once you get your shopping done you are ready to get in the kitchen. Try and shop the day before cooking if not it will make for a long day. I organized all my cooking supplies into recipes so I would have everything on hand and readily available. The book suggested if several recipes called for the same thing then do it all at once. So I had about 9 recipes that called for chopped onions so I chopped all 9 at once and kept them on hand.

I tried to cook the things that took the longest first! The meals that called for no cooking at all I prepared last. Make sure to prep and label your bags with what you will put into the bags everything kinda looks the same once they are frozen. I think freezer bags are the easiest way to freeze the meals. Once things are done being cooked and cool off place in your bags then freeze as flat as possible. Some things will call for flash freezing. Your book will explain the different types of freezing methods.
That is about it, I cooked my meals and froze them. Below are a few more pics of cooking different meals and I also listed my pointers. So far only one meal did not turn out well. All of the rest have tasted excellent!

Pointers:
1.Buy disposable casserole dishes for your casserole recipes. The casserole method of freezing did not work too well for me. It was also very difficult to defrost and get saran wrap off.
2. Purchase really good freezer bags.
3. On re-heating day if you are cooking an item that doesn't need to be defrosted you will probably have to cook it a little longer than the book says.

Here are a few pics.


My meat loaf: I will use my normal recipe next time not the books


My man helping me cook


Steak and Tomatoes

Thursday, February 9, 2012

Healthy Baked Penne with Chicken and Spinach

This is one of my family's favorite recipes!  I have made this meal for lots of people and everyone, including picky (per their parents) kids, love it.  It is a great dish to take to someone in need of a home-cooked meal, someone like a brand new Mom.  The recipe can be made ahead: it reheats beautifully in the microwave and I think tastes even better the next day!

Healthy Baked Penne with Chicken and Spinach
Makes 4 generous servings 
(Recipe can be doubled and baked in a 13 by 9 inch dish)

If you are craving a creamy pasta dish, this is a much healthier way to fulfill your craving. As with any recipe, getting all of your ingredients out and chopped, measured, etc. (mise en place) will make this dish a breeze to throw together.  Make sure you squeeze the spinach very dry or the casserole will be watery.  You may also substitute 1 1/2-2 cups of leftover cooked greens such as kale or collards if you have those on hand.  To make the dish vegetarian, omit the chicken and double the spinach.

Ingredients:
1 Tb. + 1 1/2 tsp. olive oil
12 oz boneless, skinless chicken breasts (about 2), trimmed and sliced thin
1 onion, minced
3 garlic cloves, minced
pinch red pepper flakes
2 Tb. all purpose flour
4 C. 1% lowfat milk
1 bay leaf
1/2 C. grated Parmesan cheese (about 1 oz)
2 tsp. fresh lemon juice
10 oz. frozen chopped spinach, thawed, squeezed very dry (try using a clean kitchen towel and ring out)
salt and pepper
8 oz. whole wheat penne pasta
1/2 C. shredded part skim mozzarella OR reduced fat shredded Italian cheese blend (about 2 oz)

This is how we do it:
1. Adjust oven rack to middle position and heat oven to 425 degrees.  Lightly coat an 8" square dish with cooking spray and set aside.
2. Pat sliced chicken dry with paper towels and season lightly with salt and pepper. Heat 1 1/2 tsp. of olive oil in 12 inch skillet over high heat until just smoking. Add chicken, breaking up any clumps, and cook until lightly browned but not fully cooked, about 3 minutes.  Transfer to a bowl.
3. Add remaining 1 Tb. olive oil to skillet and heat over medium.  Add onion and cook until softened, about 5 minutes.  Stir in garlic and red pepper flakes and cook just until fragrant, about 30 seconds.
4. Stir in the flour and cook for 1 minute.  Slowly whisk in the milk and bay leaf and bring to a simmer.  Cook, stirring occasionally, until the sauce has thickened slightly, about 10 minutes.
5. Meanwhile, while sauce is simmering, bring 4 quarts water to a boil in a large pot.  Add 1 Tb. salt and the penne to pot and cook, stirring often, until almost al dente but still firm to the bite.  Reserve 1/4 cup of pasta cooking water, then drain and return to pot.
6. When sauce is thickened, return chicken with any accumulated juice to the skillet.  Simmer about 1 minute until chicken is cooked through. Discard the bay leaf.  Off the heat, stir in the Parmesan and lemon juice.  Stir in the spinach, breaking up any clumps, until well combined.  Season with salt and pepper to taste.
7. Add the chicken-spinach mixture and reserved pasta water to the large pot with the drained, cooked pasta.  Pour into prepared baking dish and sprinkle evenly with shredded mozzarella.  Bake until the sauce is bubbling and the cheese is lightly browned, about 15 minutes. Let cool 5 minutes before serving.

Adapted from America's Test Kitchen Healthy Family Cookbook
 Pin It

ShareThis

Related Posts Plugin for WordPress, Blogger...